
How to FIX Unlinked Footage - Premiere Project Template
By Kevin Waczek
Is there anything worse than unlinked footage? Maybe Adobe crashing before you were able to click “save,” evaporating your last four hours of edits. Anyways, unlinked footage is a real pain. How do we avoid this inconvenience?
Avoiding the beast
The quick fix for relinking footage is to right click on the missing footage and click “relink footage.” Then click on the footage that needs to be relinked.
What if I can’t find the footage I need?
It’s time to stop our reckless ways and get to the root of the problem.
Taming the Beast
The main cause of unliked footage is poor organization. It all begins with the import of all raw footage.
Crew Member Tip: The person responsible for importing raw footage belongs to the DIT (Digital Imaging Technician). If there isn’t a DIT then the task falls onto the editor.
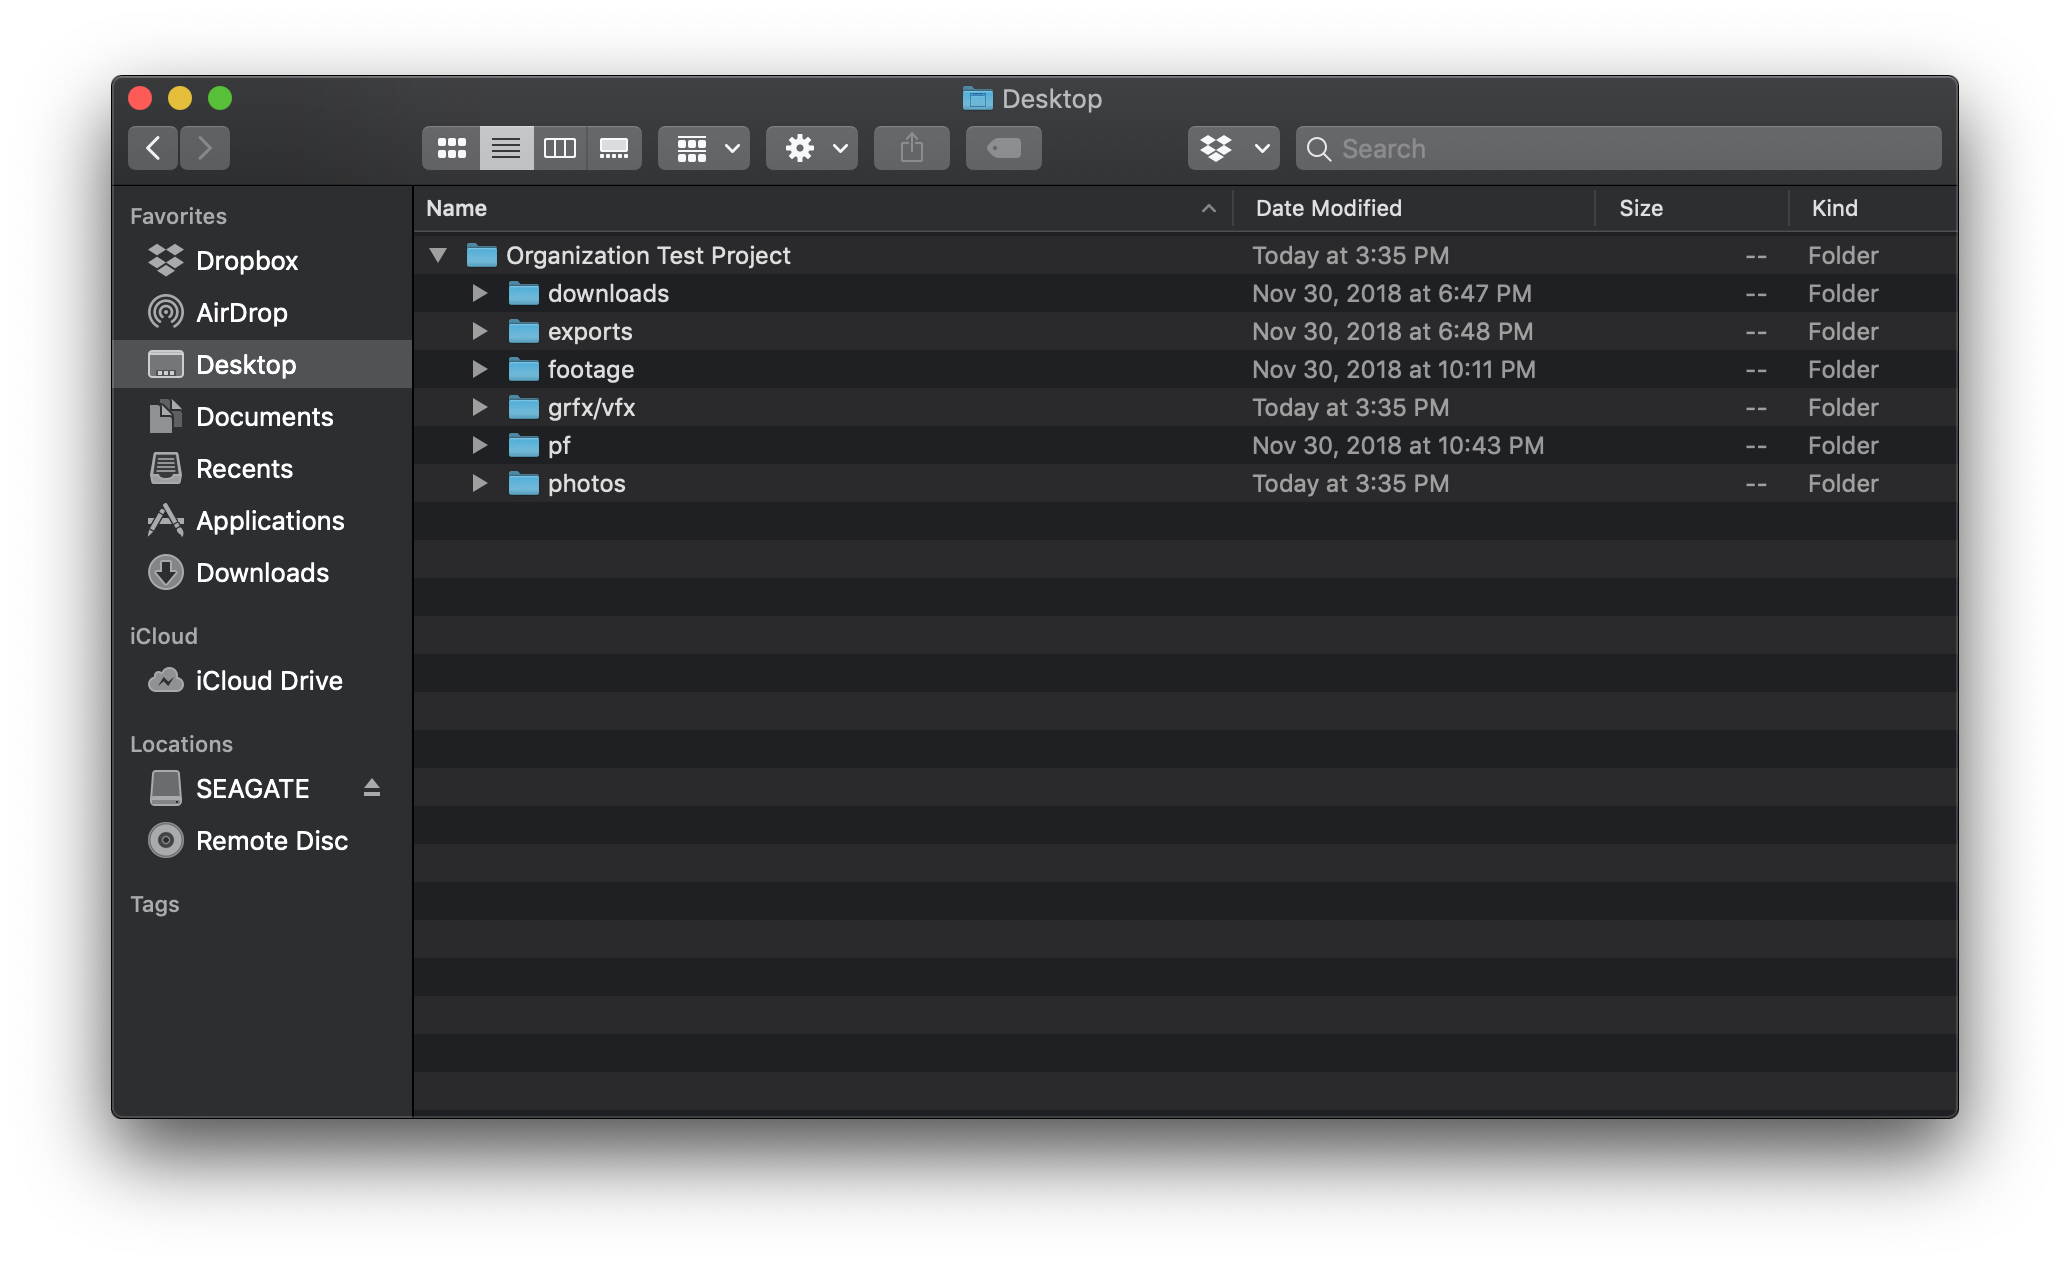
Organizing footage is key to avoiding unlinked clips in your editor. Above is my personal template of how I organize my footage. No need to create your own copy, I have a free downloadable template above! I split the project file into these sections: downloads, exports, footage, graphics (grfx)/visual effects (vfx), project files (pf), and photos. This is my base template. Depending on your project, you may not use all of the folders or you may need more for special elements.

When importing footage, place the files in the correct folder by day (production day) and roll (memory card). Days can be labeled by each day of production in order, or can be labeled by date. The term “roll” is referring to the memory system, whether it be an SD card, C-fast, or an actual film reel.
Extra Tip: If you ever want a folder or file to always be at the top position place an “*” at the beginning of the title.

After the footage is imported, it is time to create the project file. Save the new project timeline to the project folder (pf) folder in our file system. All project files from Premiere or other programs such as After Effects will be saved in the “pf” folder. This will keep all of your timeline autosaves all in the same place. Having different folders for every timeline for every program can easily become disorganized.

For every version you export, set your settings in Adobe Premiere or your editor of choice to export into the project folder’s export folder. I’ve been a victim of exporting a video and not knowing where I told Adobe to put it.
This same system also applies to the grfx and vfx files. Save the project to the project files and exports to the grfx/vfx folder. I choose to separate grfx/vfx and normal exports.
The best part about having an organized file system is that it transfers smoothly into the premiere project.
Being Portable
As I said earlier in this blog post, having an organized project folder will allow you to make your project portable by placing your files on a hard drive. This is how I typically work. That way I can make edits and export even when I am not on my main computer or traveling with my laptop. This only works if you’re organized. Leaving important clips or videos on your desktop, downloads, or document folders will cause unlinked footage and high levels of stress and anxiety.

More on the DIT: The DIT is also responsible for labeling each video and audio file by the scene, shot, and take number found on the slate. That way the editor is able to find every shot or audio file quickly and efficiently.
Thank you for reading and supporting The Filmmakers Blog. If you have questions? Comment below! Or email me at kevin@thefilmmakersblog.com and don’t forget to download the Premiere Project Template!