
How to make a Low Budget Music Video in 2025
Welcoming all poor filmmakers! All aboard! We’d punch tickets on this train but I already know you didn’t purchased one… but here we all are.
That’s the mindset you need to have when it comes to filming on a budget. You have a ticket to ride even when you don’t.
WHY AM I MAKING THIS
Recently, one of my OLD YouTube videos just started popping off. Racking in views like crazy. How crazy? Well after it’s first three months with only 50 views it’s now over 49,000 at the time of writing. It was all about Low Budget Music Video Shot Ideas using a music video I made a few years ago.
Since then I’ve made another in the exact same style. This is when I realized I created sort of a Low Budget Music Video Formula. So now I’m giving the people what they want and sharing it with you.
Call it a “how to”. How to make a Low Budget Music Video in 2023 (and beyond).
WHAT YOU WILL LEARN
Types of Low Budget Music Videos
Gear List
Watch The Music Videos!
Locations
Lighting Breakdown
Post-Production
It’s All Up To You
TYPES OF Low budget MUSIC VIDEOS
All music videos are not created equal. This formula is a tried and true method for performance music videos. But before we go any further let’s do a quick review.
1. Performance
This is the type of music video where the artist is actually singing the song in the video (most videos are like this). Nearly all the action is on the lead singer and band playing their song.
2. Story
This is when the artist is either a character in the video or actors are portraying the theme of the song in the music video. Most bands that go this route have a blend of Story and Performance.
3. Experimental
Who knows what the heck is going on in this type of music video. But you can’t deny that it sure is artistic. Pretty much anything goes. This type can still include elements of Story and Performance but it is usually avant-garde and will leave you scratching your head.
GEAR LIST
Whenever we talk low budget we have to quickly touch on gear. I’ve said this before and I’ll say it again. Low budget is only for those who have a small gear list already. Like baseball there is a paywall to play. You simply need a bat for starters. For you it’s a camera. So if you have nothing then it is impossible for this project to be low budget.
However, only a small gear list is required.
Gear I had:
Camera: Sony 6500 - Anything will do here as long as it shoots 1080p (4K is best). 2 Lights: Aputure 300d and Aputure LS1. Reflector. Black/White Backdrop. Cheap fog machine.
Gear I got:
2 Colored Lights: LED 1x1 Lupo Full RGB
Some of you may look at that list and only have a camera. Well I did say low budget. Not no budget. I do not expect you to buy all of this. Ask your friends to borrow their lights or find some cheap rentals. The total shouldn’t come out to more than a couple hundred dollars to get what you need.
Tip: If you have lights but not colored lights buy a pack of gels instead. But be aware the gels will cut down the light output significantly. So those lights better be powerful.
Tip: Get a LOUD portable speaker so that the artist can hear the song and be able to sing along. If they can’t hear the track they will look lost and that will hinder their performance.
Tip: If you can, put a click track in the song to keep the artist on beat while they are performing. Also add a count in at the very beginning of the track so the performance doesn’t start abruptly.
MUSIC VIDEOS
From this point on we will be displaying the tale of two music videos. They both follow the formula but have some differences between them because every song is different and requires tweaks to fit each unique artistic situation.
Taking Over Me - Ryan Waczek
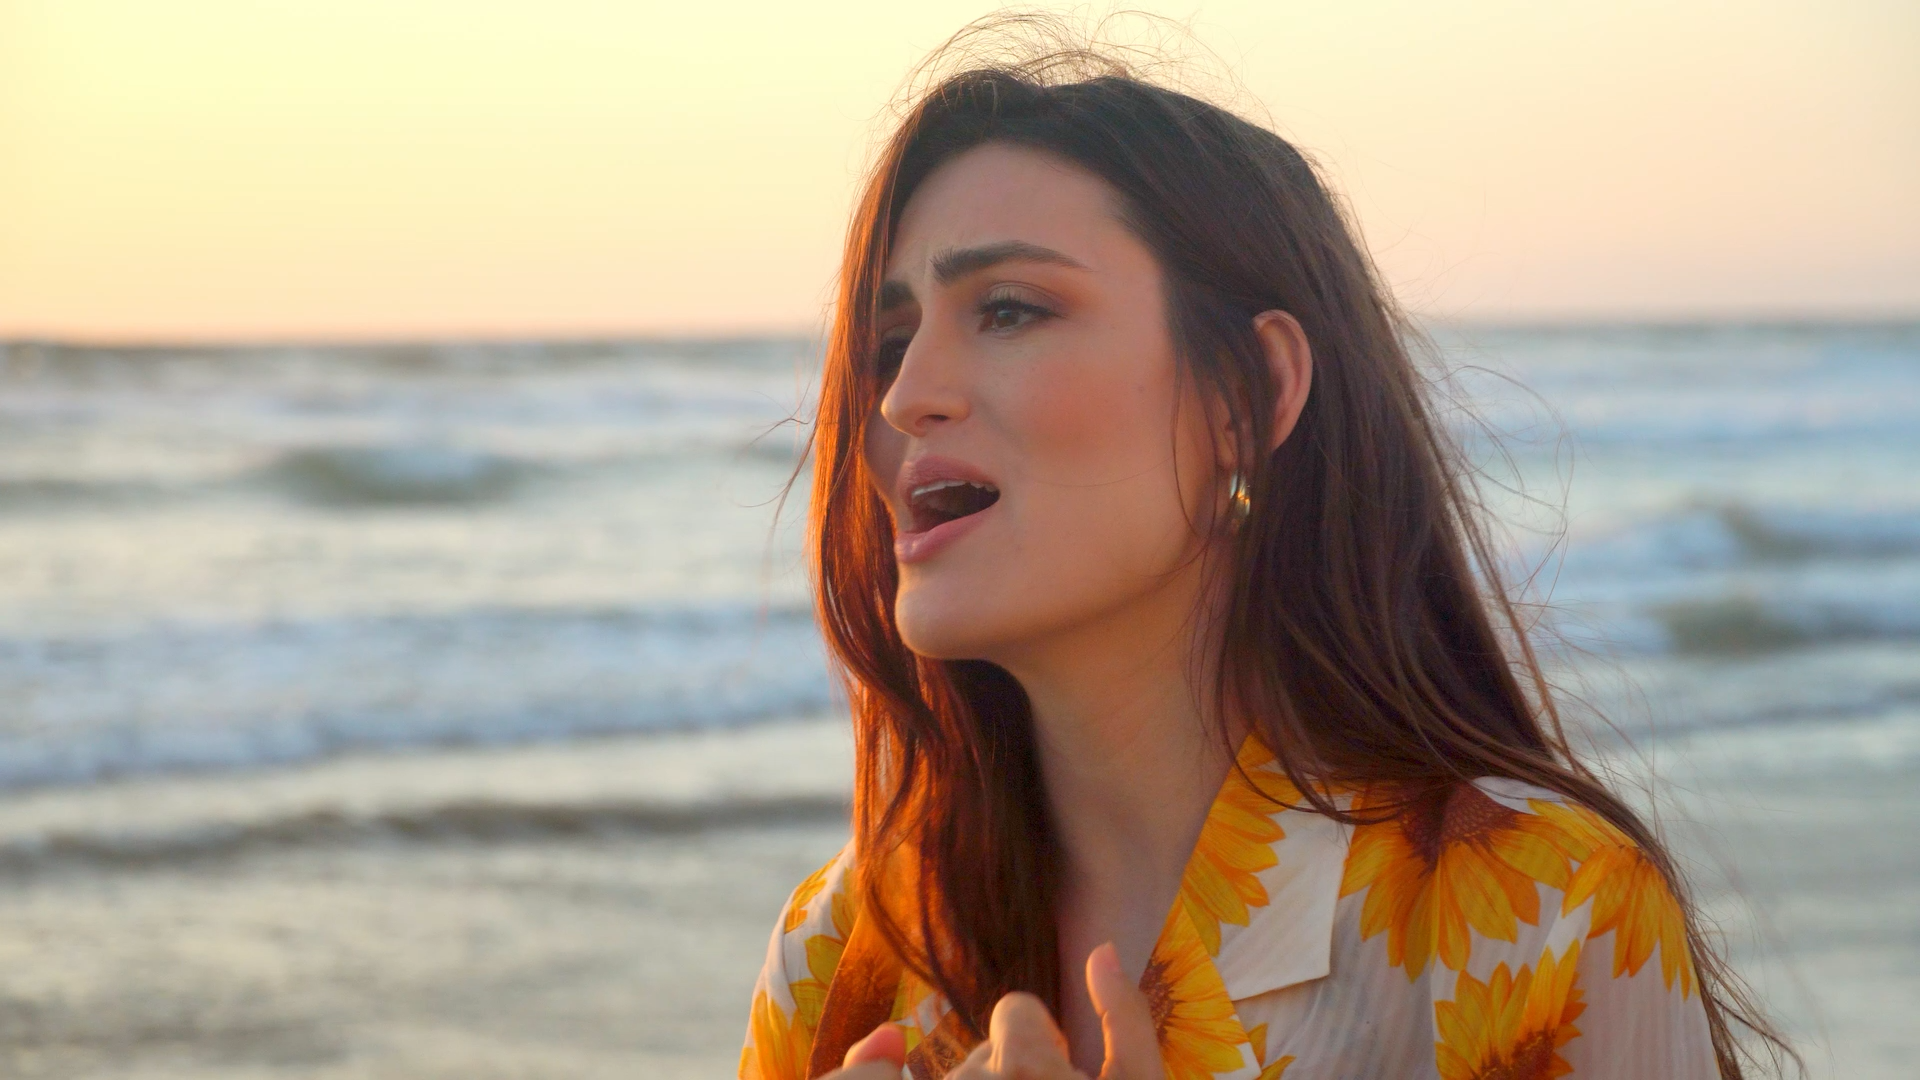
Tan Lines - Catherine Forte
LOCATIONS
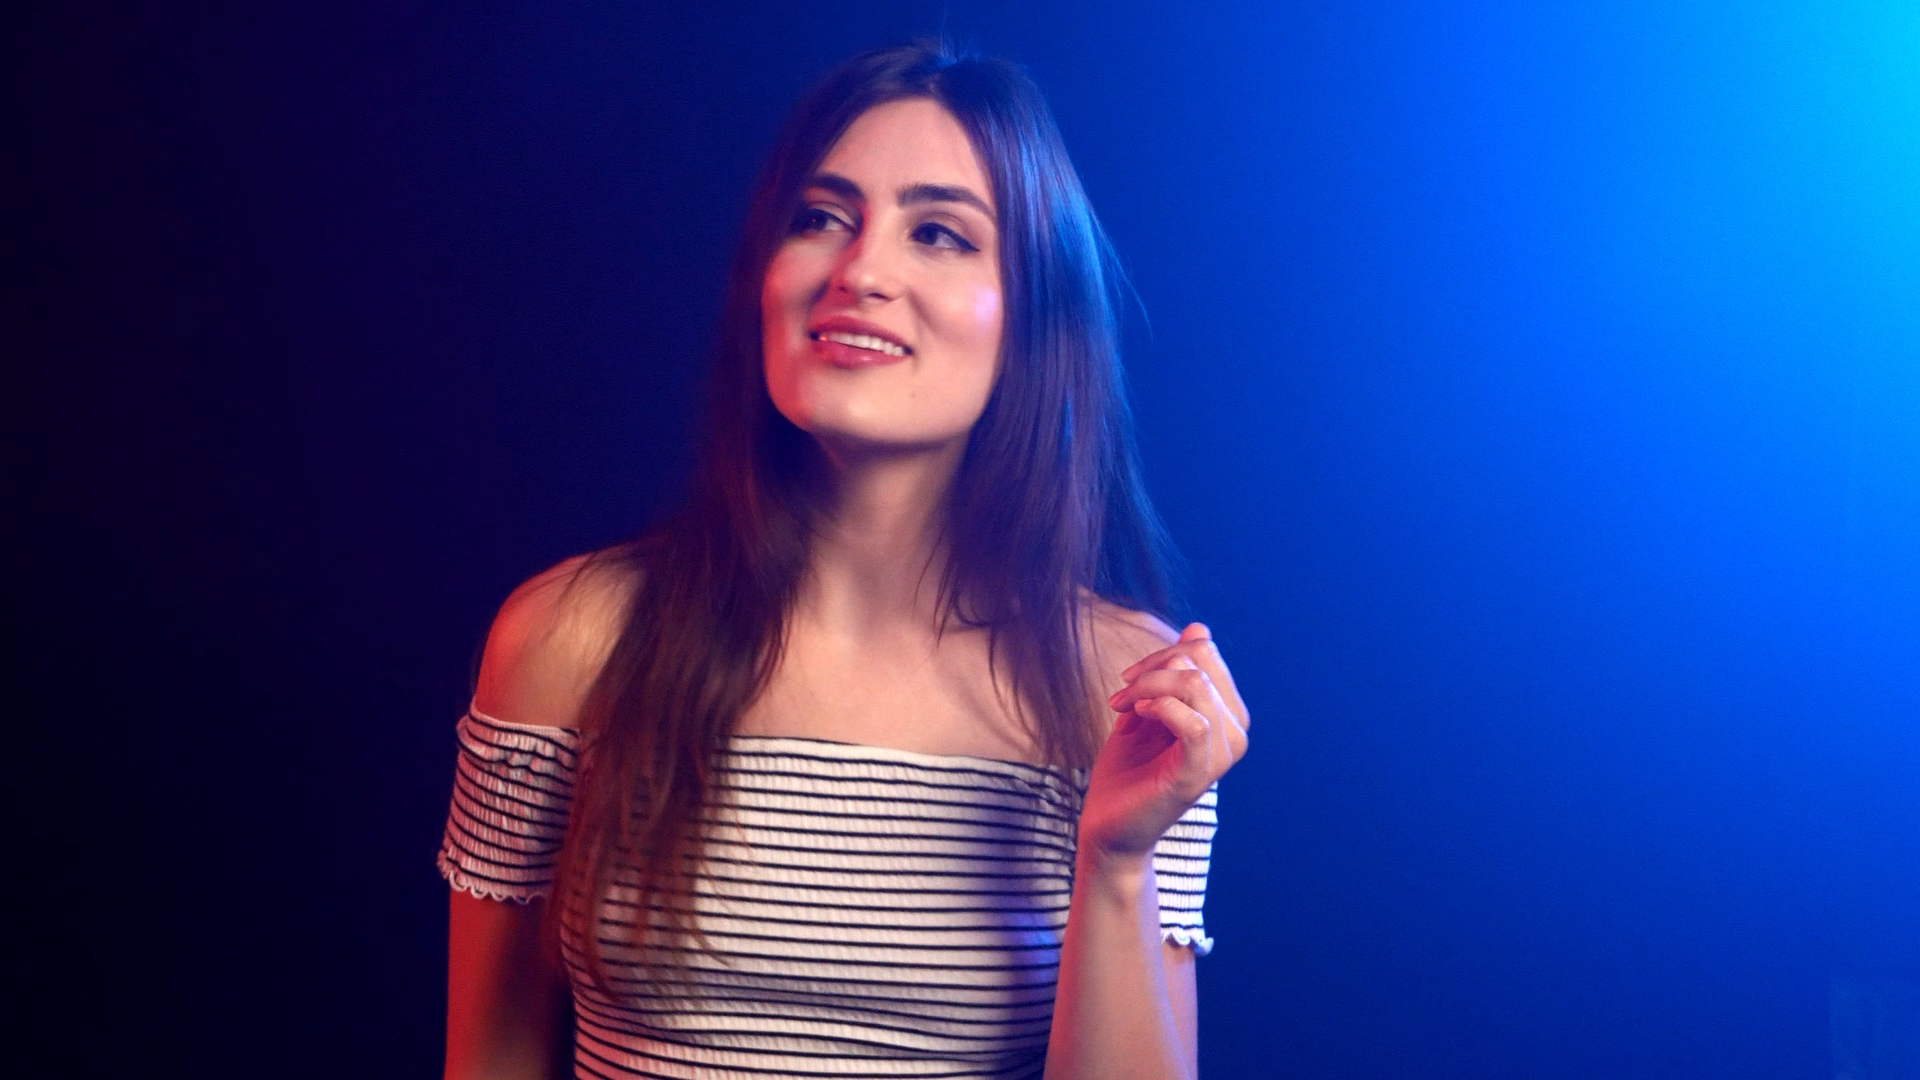
A change in location is the best way to keep the visuals of the music video interesting. You can use the change to bring new things to the foreground of the video or create a continuation of movement between the locations (match cuts). I’ve found that having at least one outdoor location is key especially during golden hour (the last hour before sunset or sunrise). This is a naturally beautiful time and you should always harness the biggest light on set, the sun, whenever you can. The second location must contrast the first. Either an indoor scene or maybe a night scene. Something that is starkly different than the first. This doesn’t always have to be lighting but color and texture can create that contrast as well. For the third location set up a basic studio in a dark room using a black backdrop. This is where we can introduce colored light to amplify the creative juices and make some cool images. Feel free to have more locations than this. But I’ve found it’s best to have at least three for a performance low budget music video.
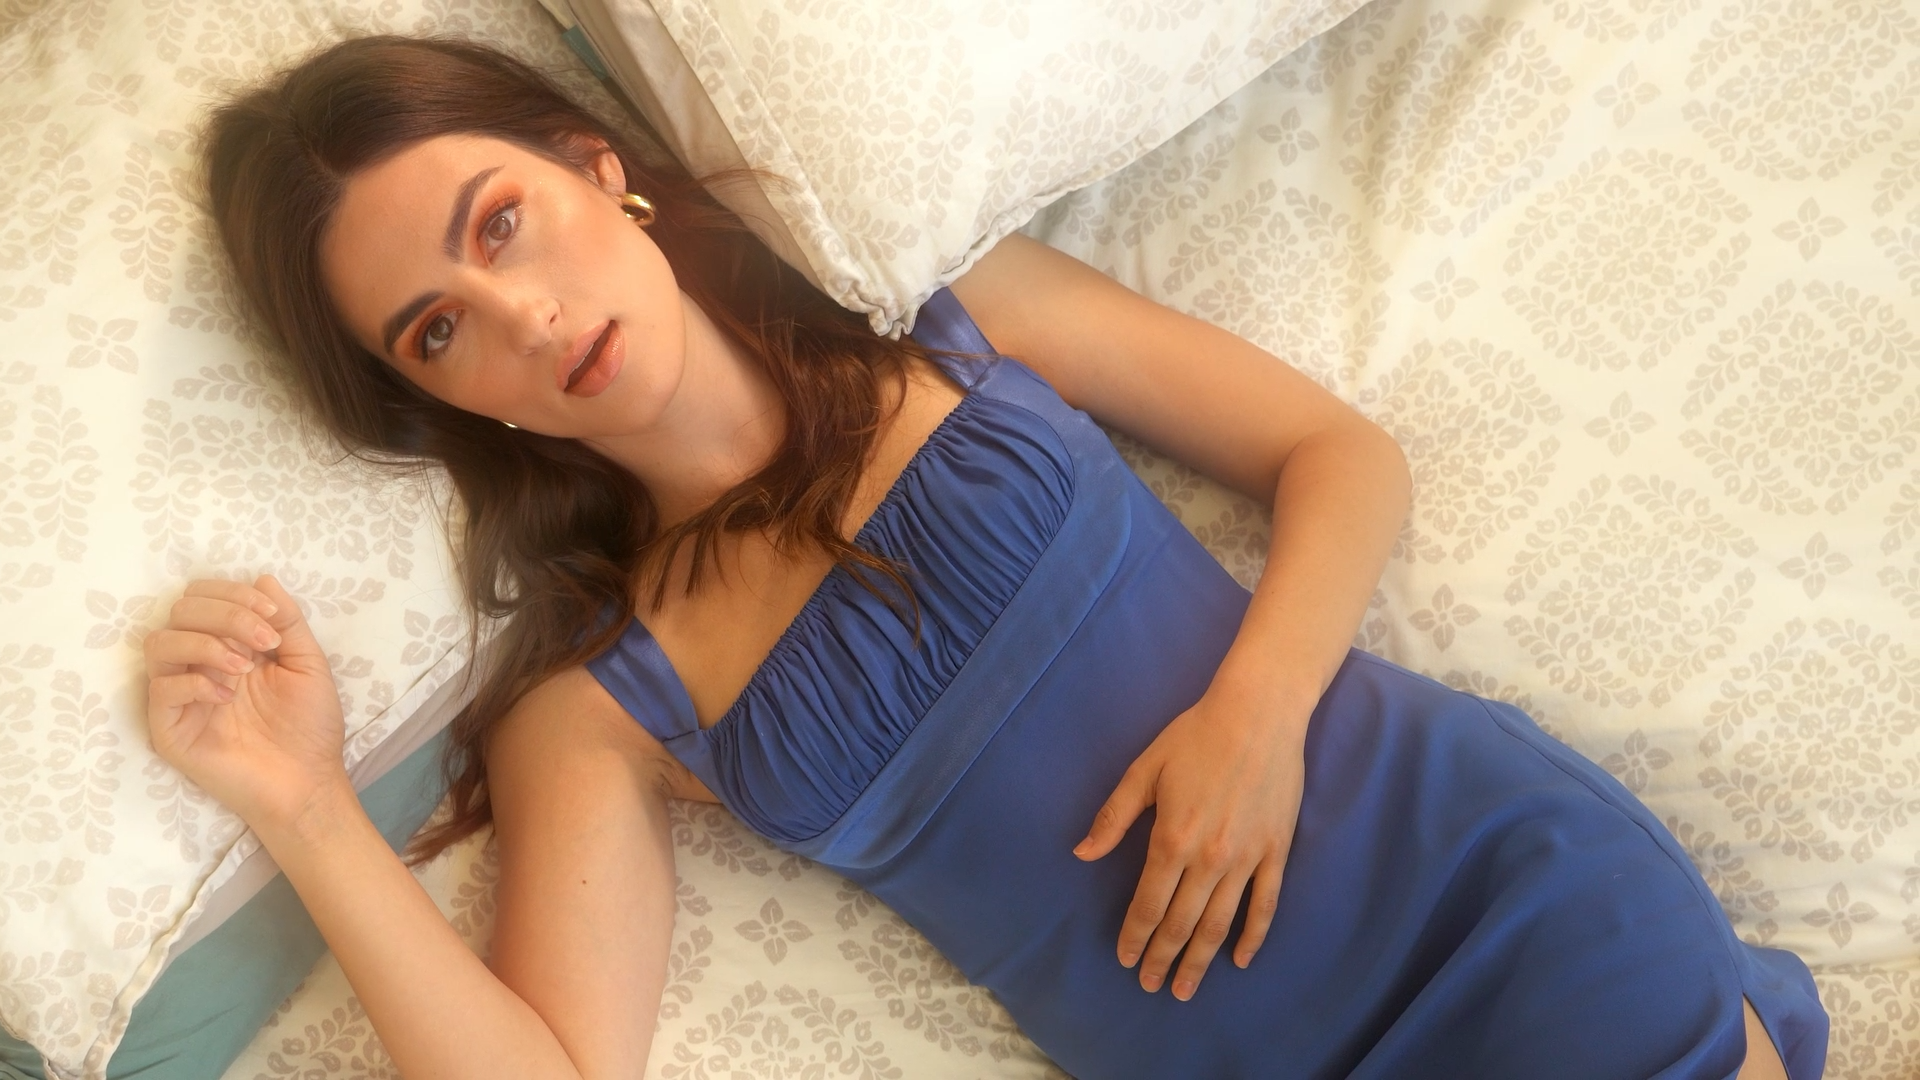
KEY: When referencing the images below TL (Tan Lines) and TOM (Taking Over Me) will be used. For extra specification an L or R will be added for left and right.
Ex. TL 1 R = Tan Lines Location 1 Right Image
Location 1: Outdoor Golden Hour
Location 2: Contrasting Alternate
Location 3: Studio Look - RGB
Lighting BReakdown
1. Golden Hour
When we are dealing with the sun there is a lot of manipulation that typically needs to happen in order to get a really nice look. But we don’t have a lot of gear or time. We need to be in and out fairly quickly before any “concerned citizens” find a security guard to ask you to leave.
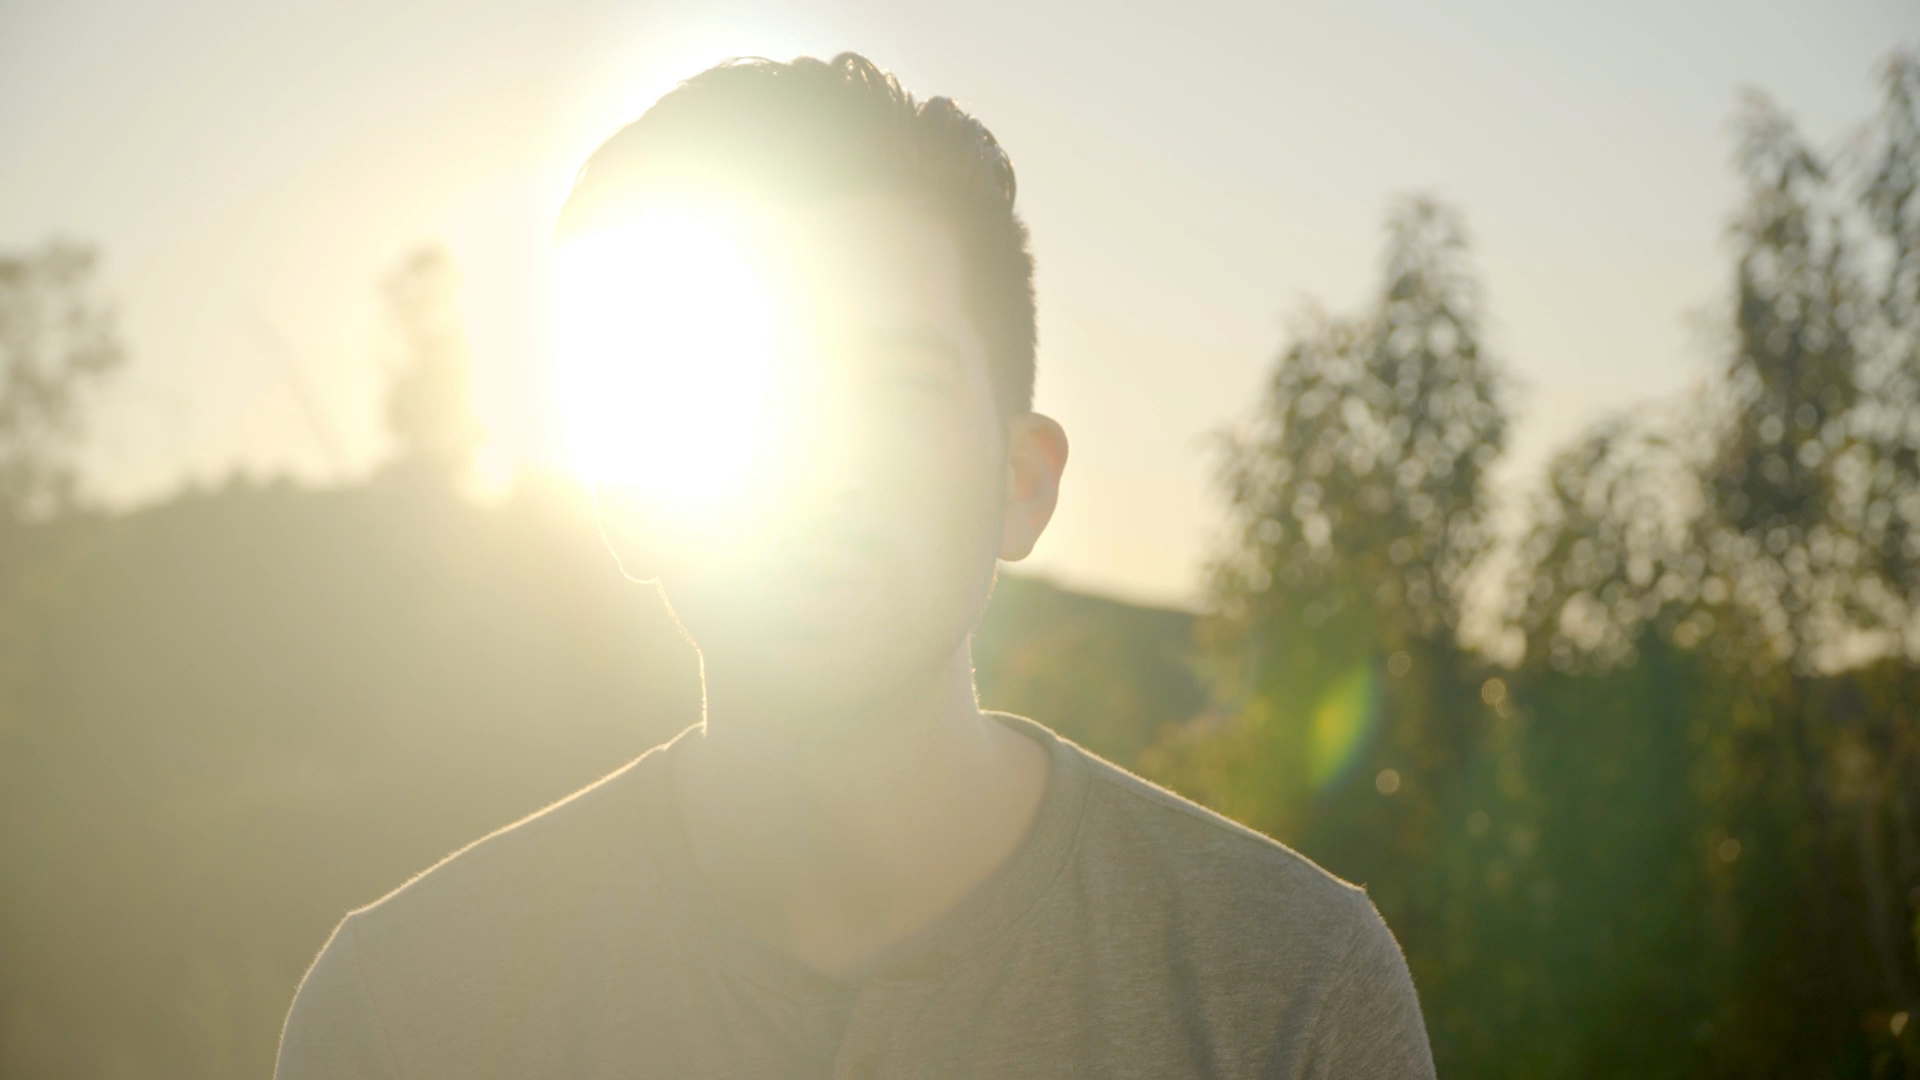
My go to lighting scheme for golden hour is to have the sun backlight the subject. Then use a reflector to bounce the sunlight back into the subjects face (TOM 1). Naturally the sun is brighter than the light you are bouncing back. So the background will be brighter than the foreground. This is okay as your subjects face should still be bright enough for it all to work. The cool thing about this setup is that you can use the movement of the subject and camera to create light leaks by crossing the light path with their body. This creates a cool effect and makes your frame more interesting without incorporating anything new to the shot.
The second go to lighting set up for golden hour is to use the sun as your key light. This way your subject is facing the sun and you will then bounce the sun back into the subjects face with a reflector (TL 1 L). In this shot the background is plenty bright to separate the subject from the horizon so no backlight is needed. This gives more of a classic lighting look that makes the subject pop out of the frame.
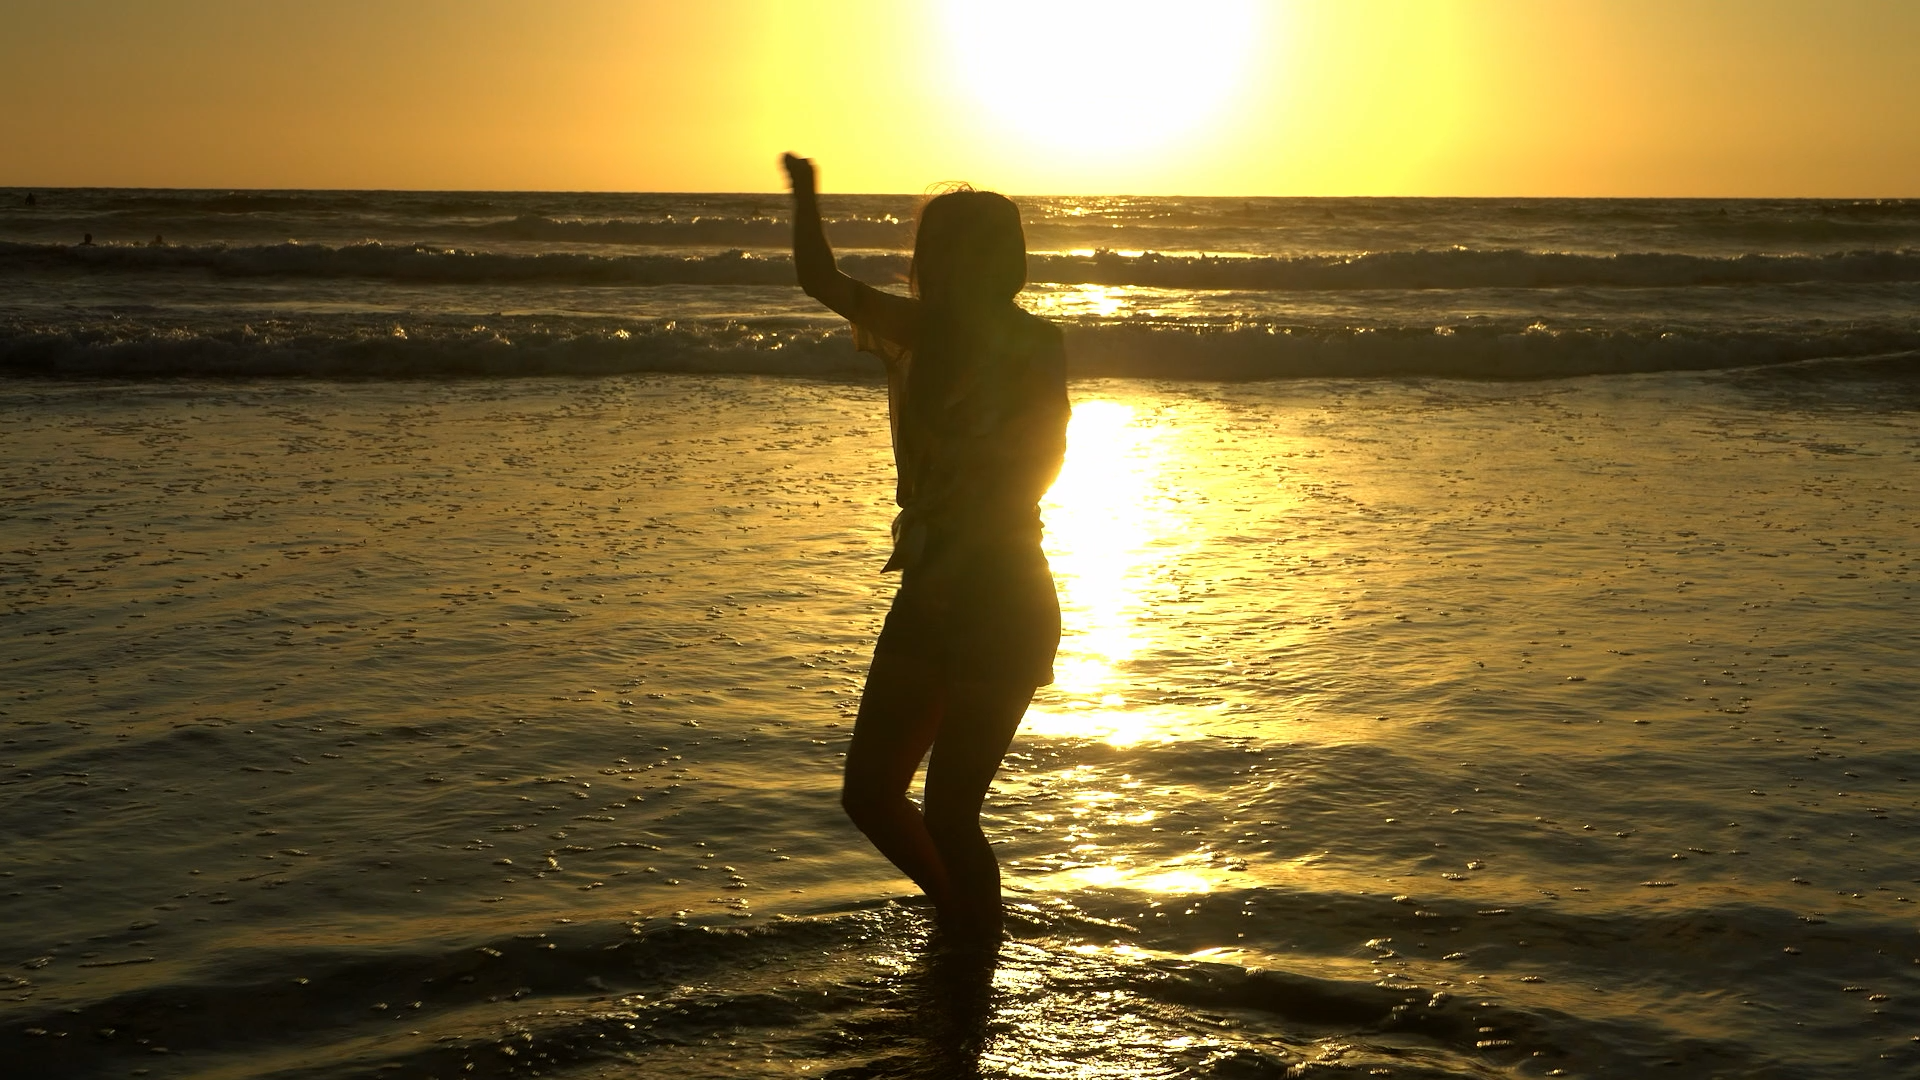
The third option is to silhouette. This requires no extra gear. It is simply a change in your camera settings. I closed down my f-stop to expose for the sun and placed the artist in front. The light wraps around the subject allowing us to clearly see the full body (TL 1 R).
2. Indoor Scene
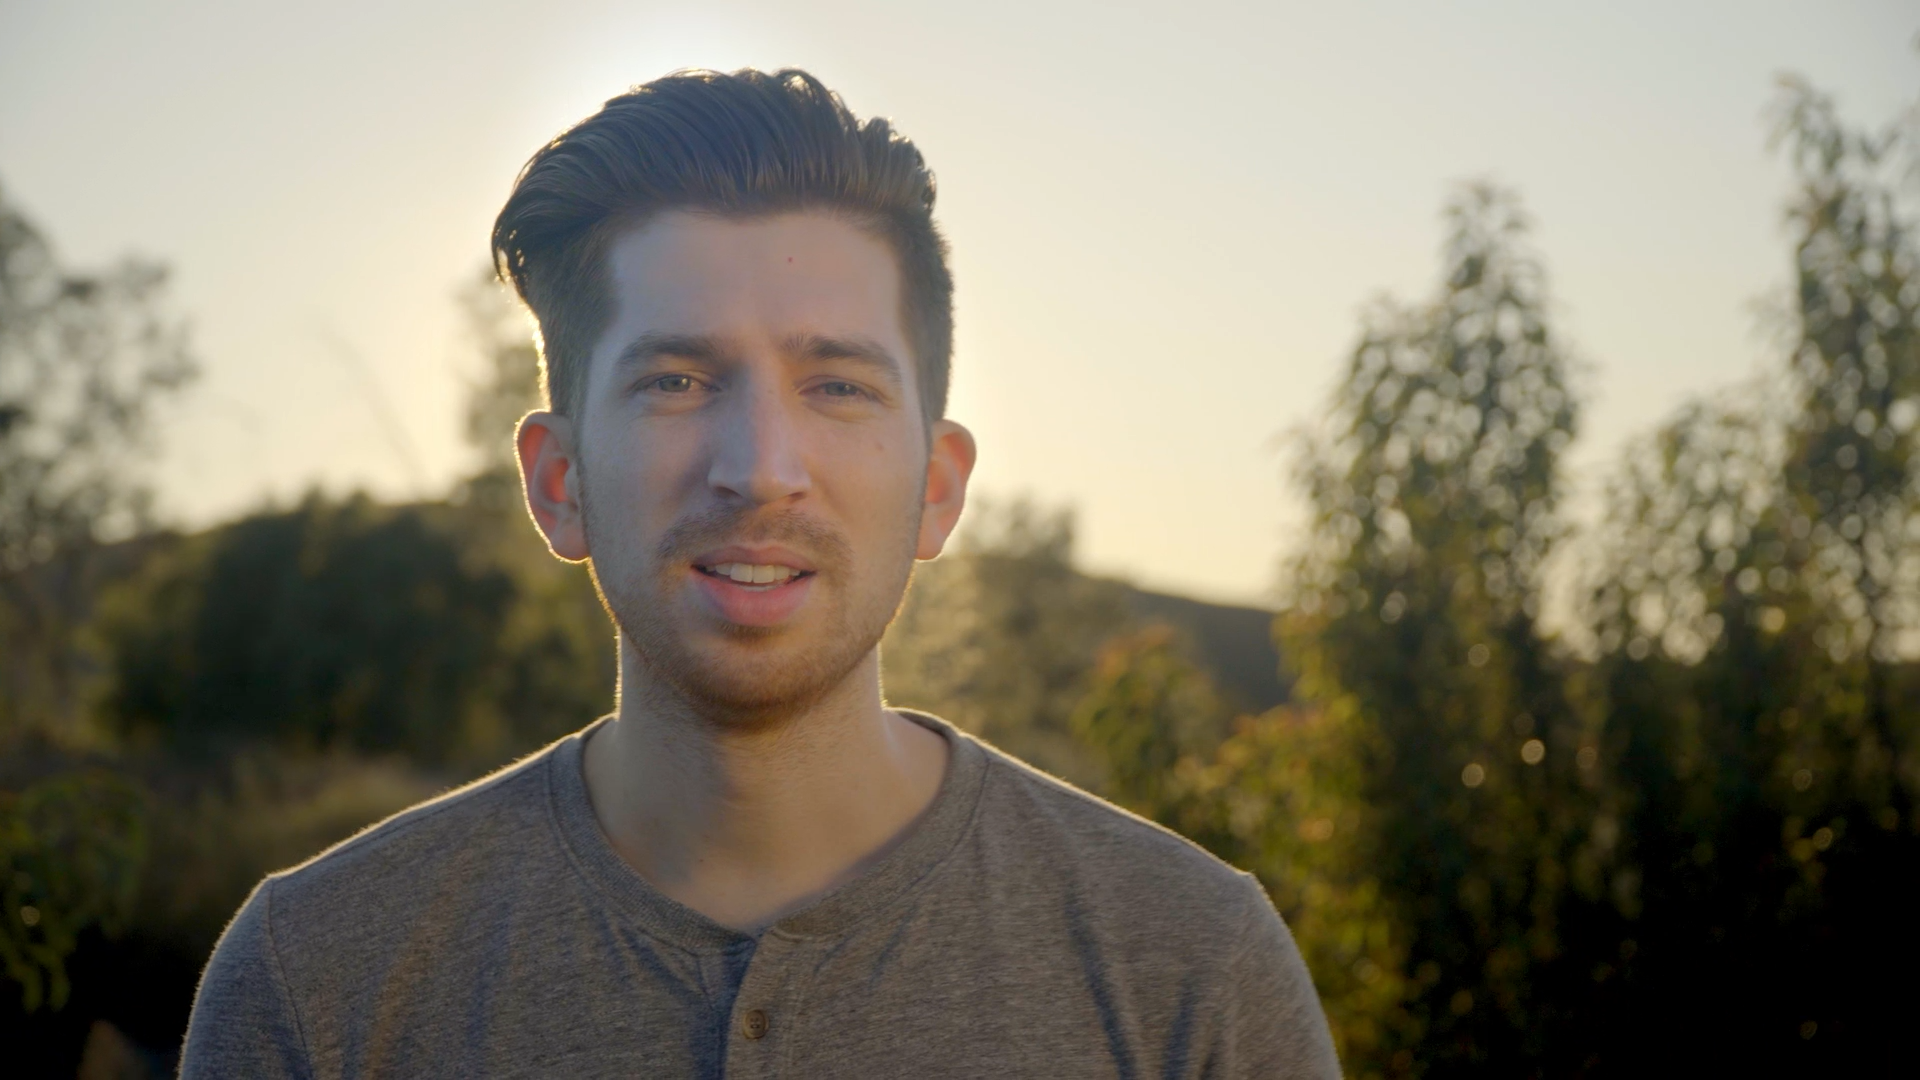
The most common indoor scene when on a budget is in a house. Your house, your friends house or your parents house. We shot in a bedroom. The biggest concern with a lot of indoor bedroom scenes is that the rooms are too small. This is no exception. You might have to shoot through the doorway to make it work or rearrange furniture to give you some operating room. Using a wide angle lens will also help. This room is just big enough to have two lights and a camera operator.
The lighting is not complicated. A standard three-point lighting (LT 2). I used a large source for a key on camera right and used an ambient fill to lessen the shadows. Instead of pointing the fill light directly at the subject, I bounced it off the ceiling. This will make the light bounce around the room raising the overall light levels of your scene. The sun is helping us out leaking through the blinds and acting as our backlight.
2a. Outdoor Scene
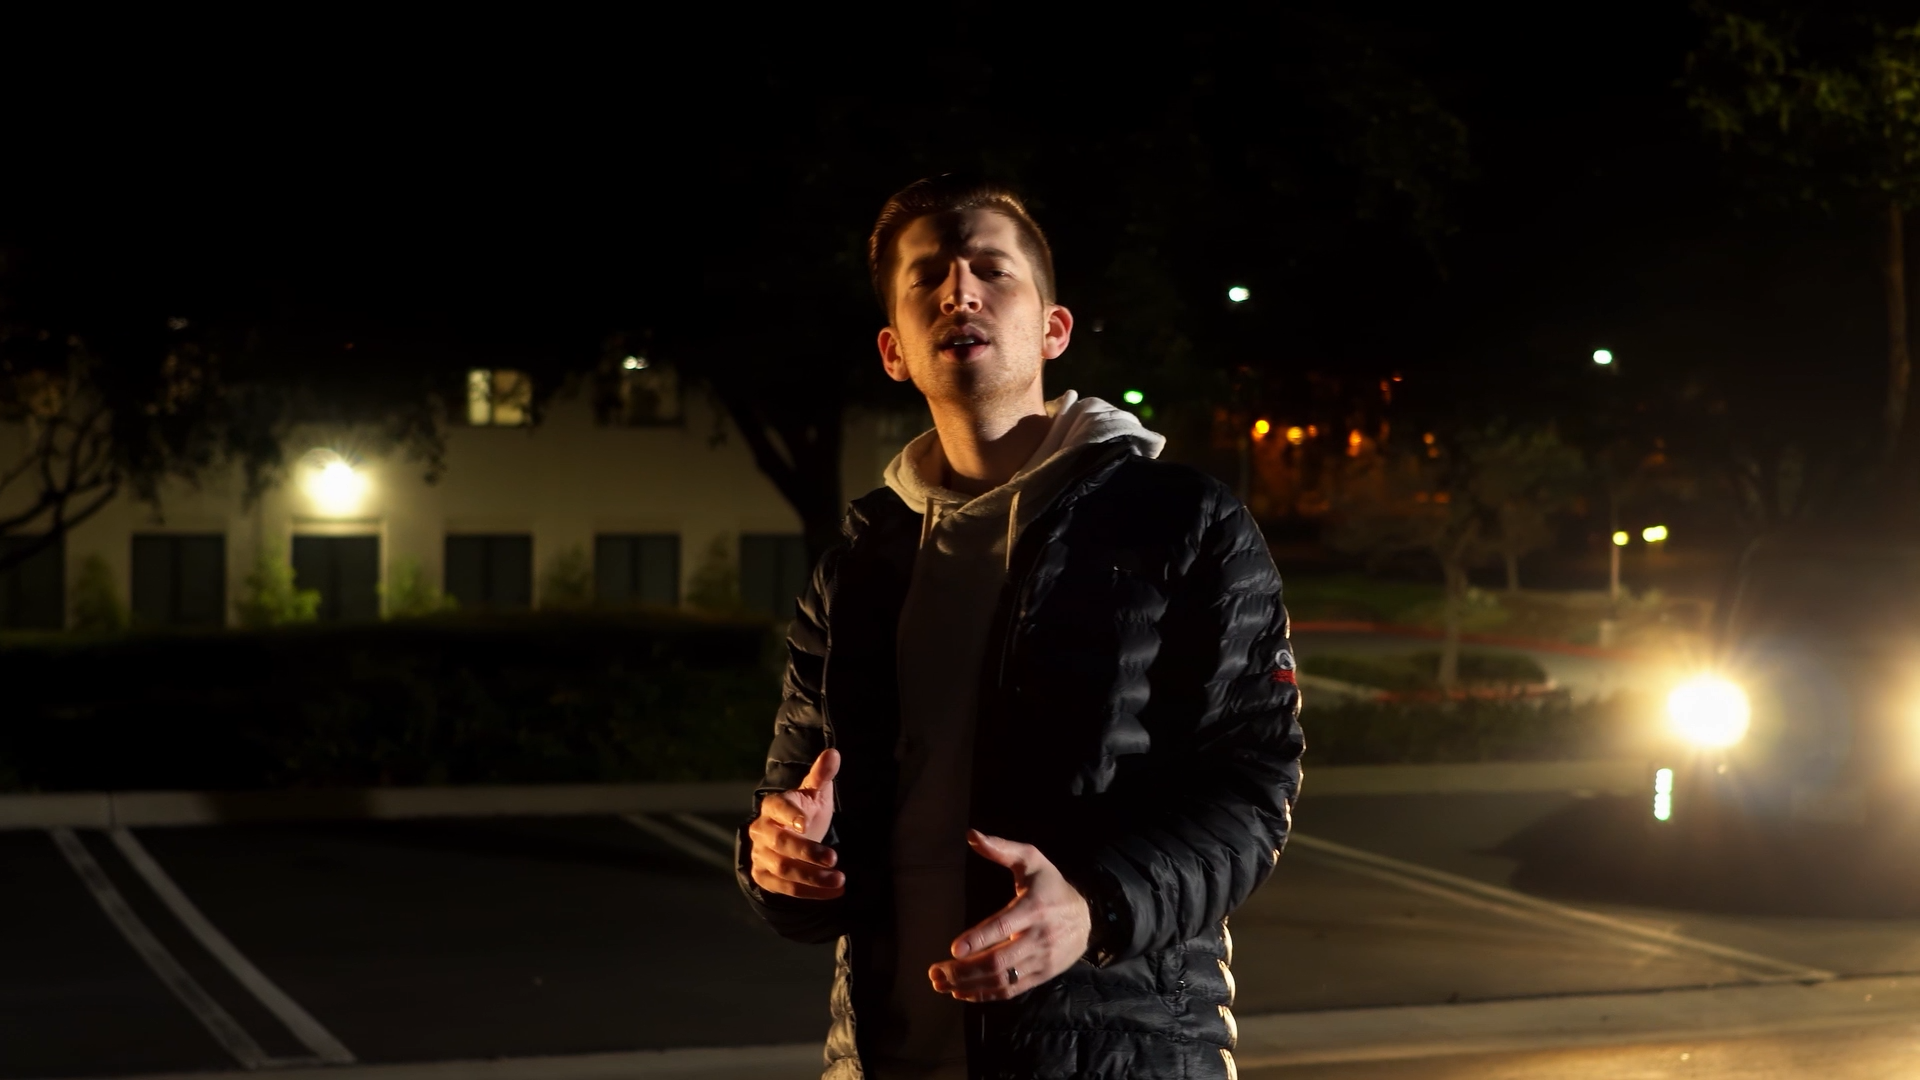
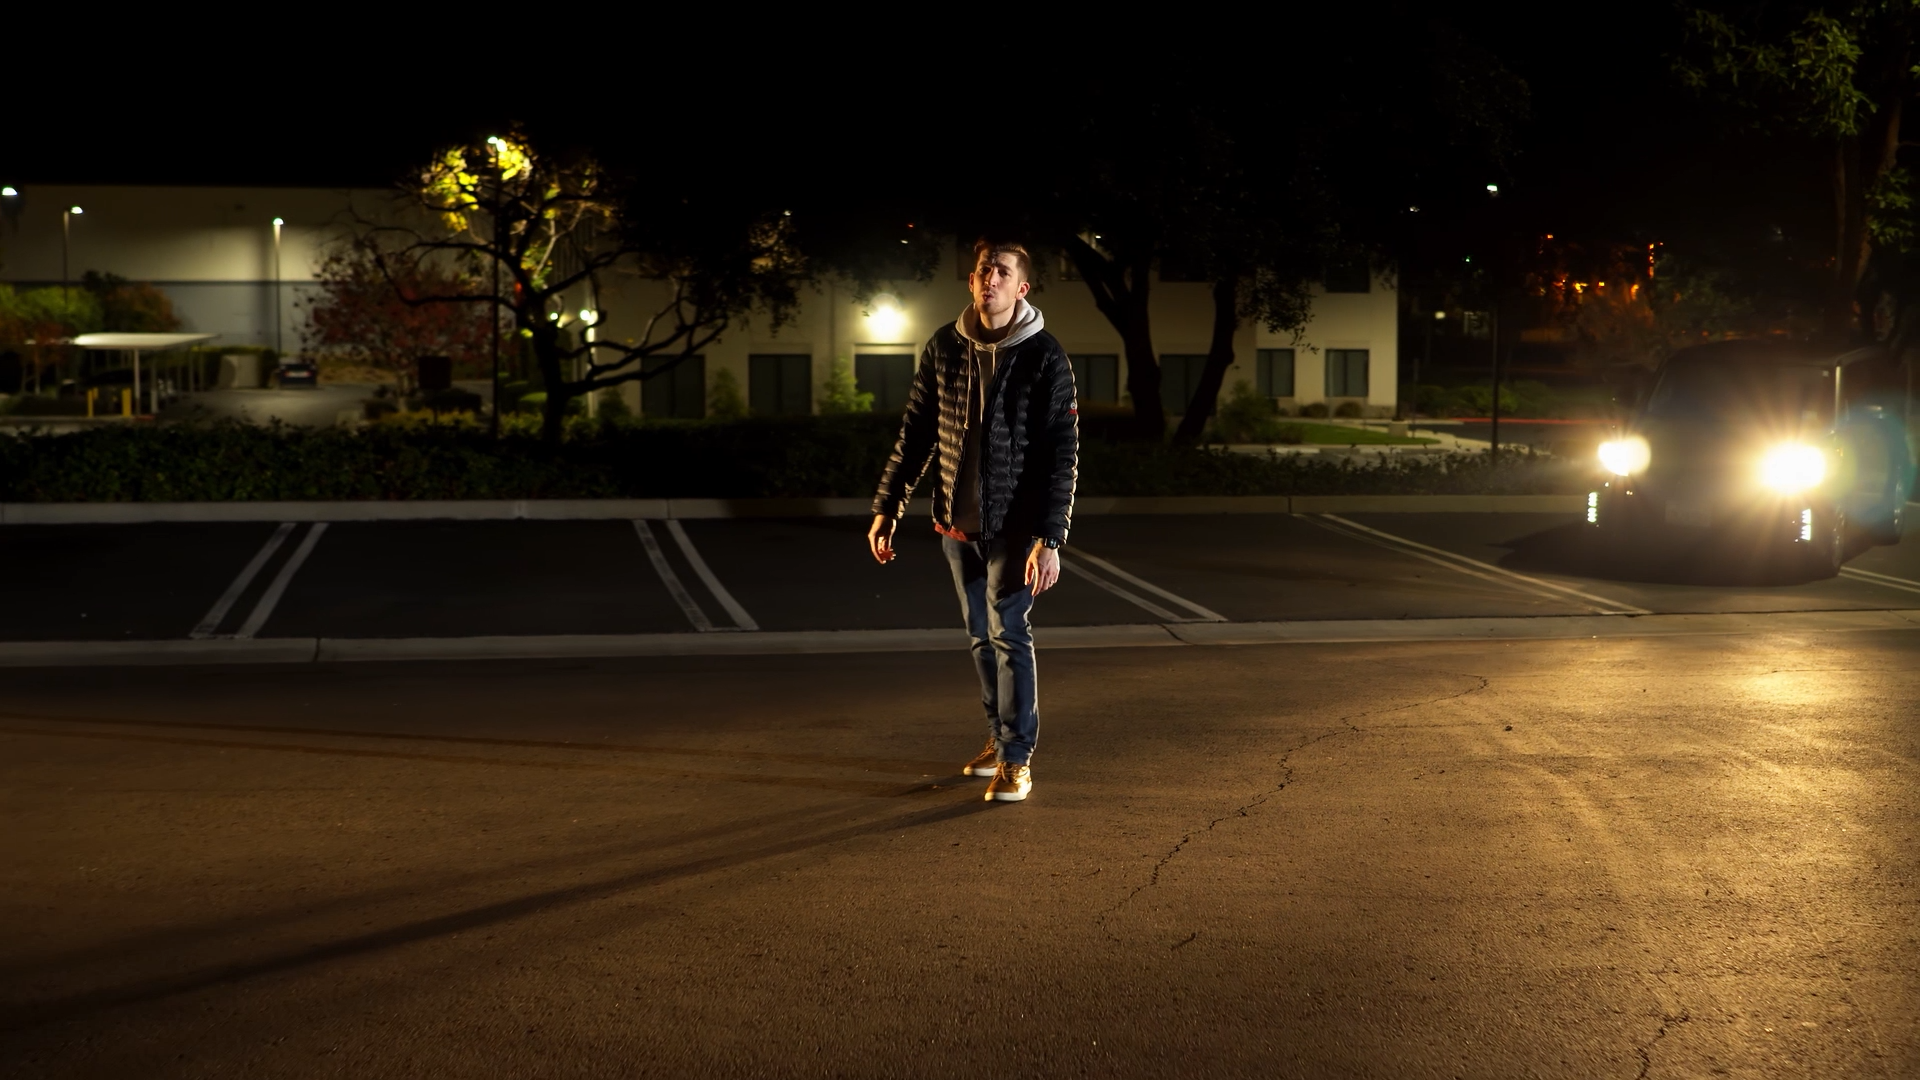
A beach and a parking lot. Two completely different vibes but they both made their way into a music video. We had to get creative with this one (TOM 2). With only one light for this shot I had the idea of parking our not so cool cars in the background and using the headlights as a double backlight on the left and right side. Not only would this separate our subject from the deep dark background but it also illuminated the asphalt giving the overall image a warm look. The warmth from the headlights also created a color contrast when compared to the white key light.
TIP: In the video you will notice that the subject moves around a lot in this scene. Yet the light levels are consistent throughout. This is because the light is far away from the subject. This balances the light levels allowing the subject to move without a large increase or decrease in exposure.
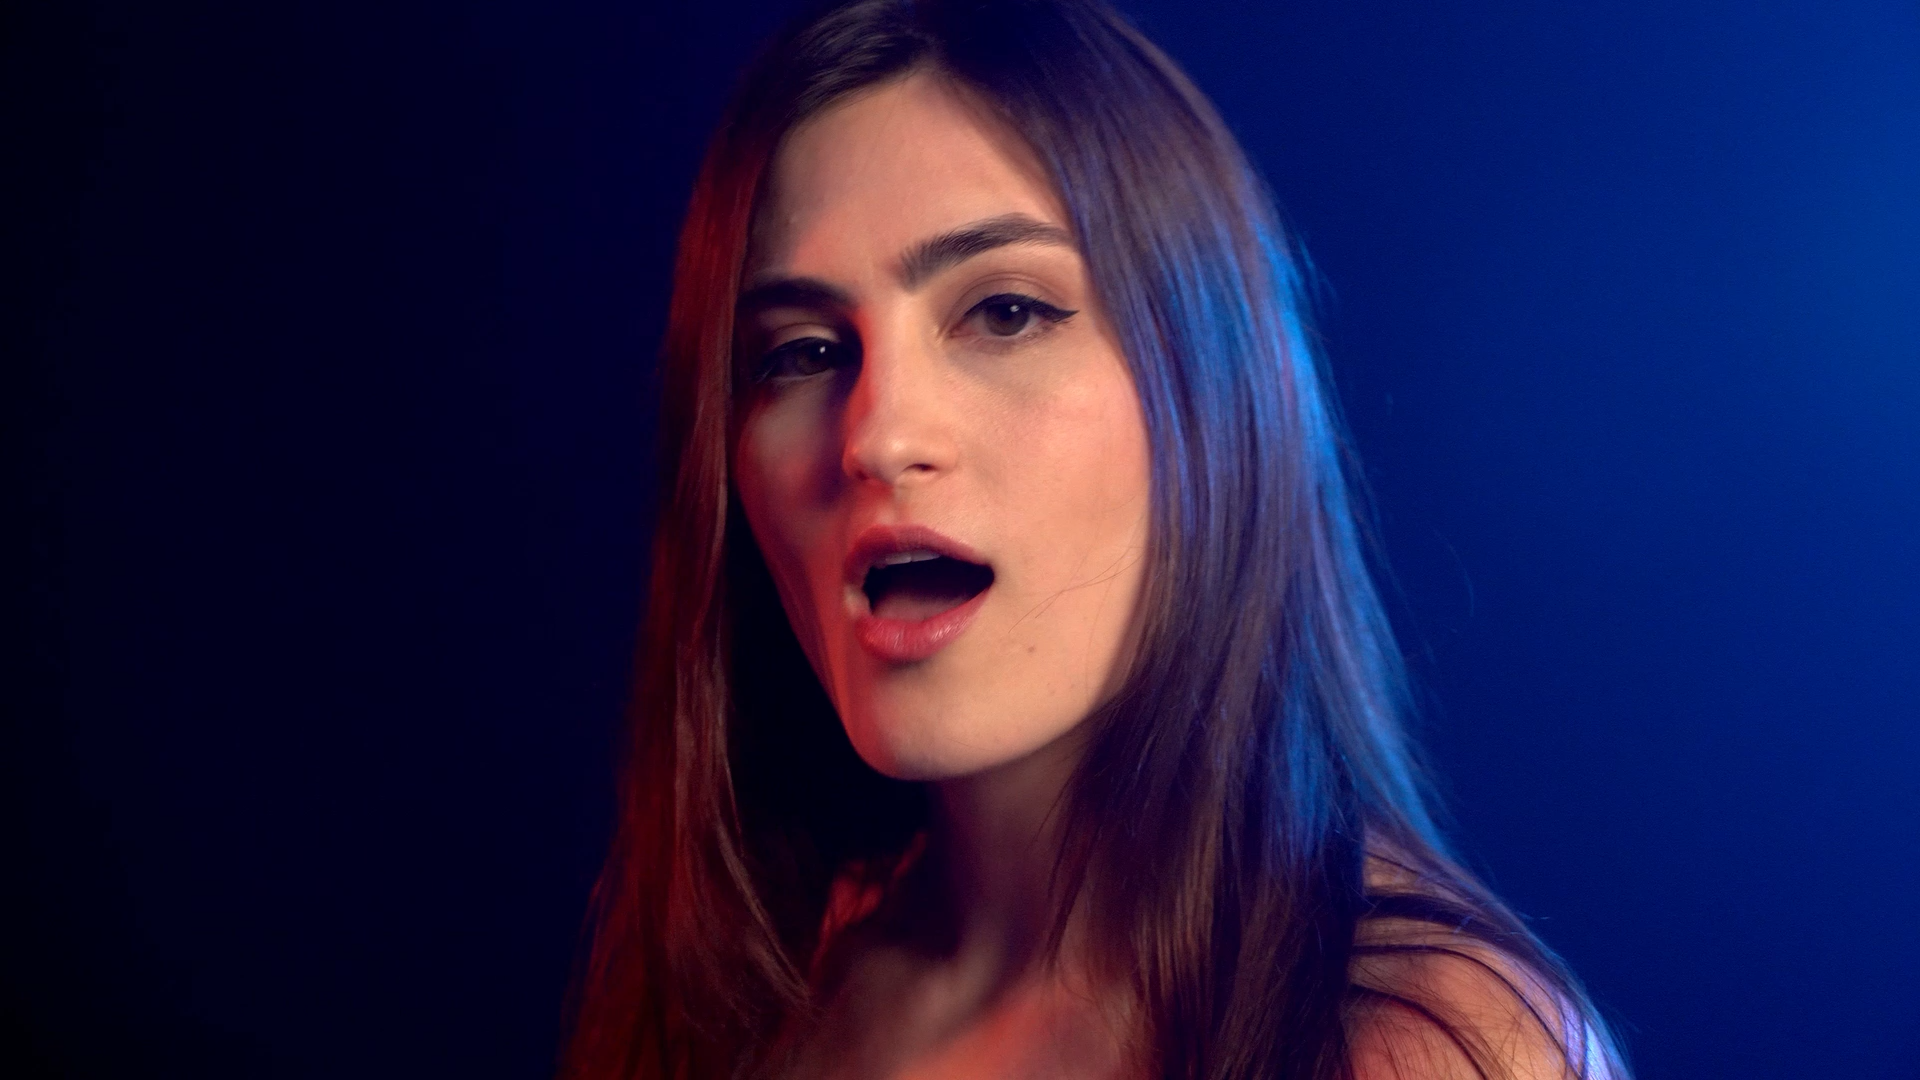
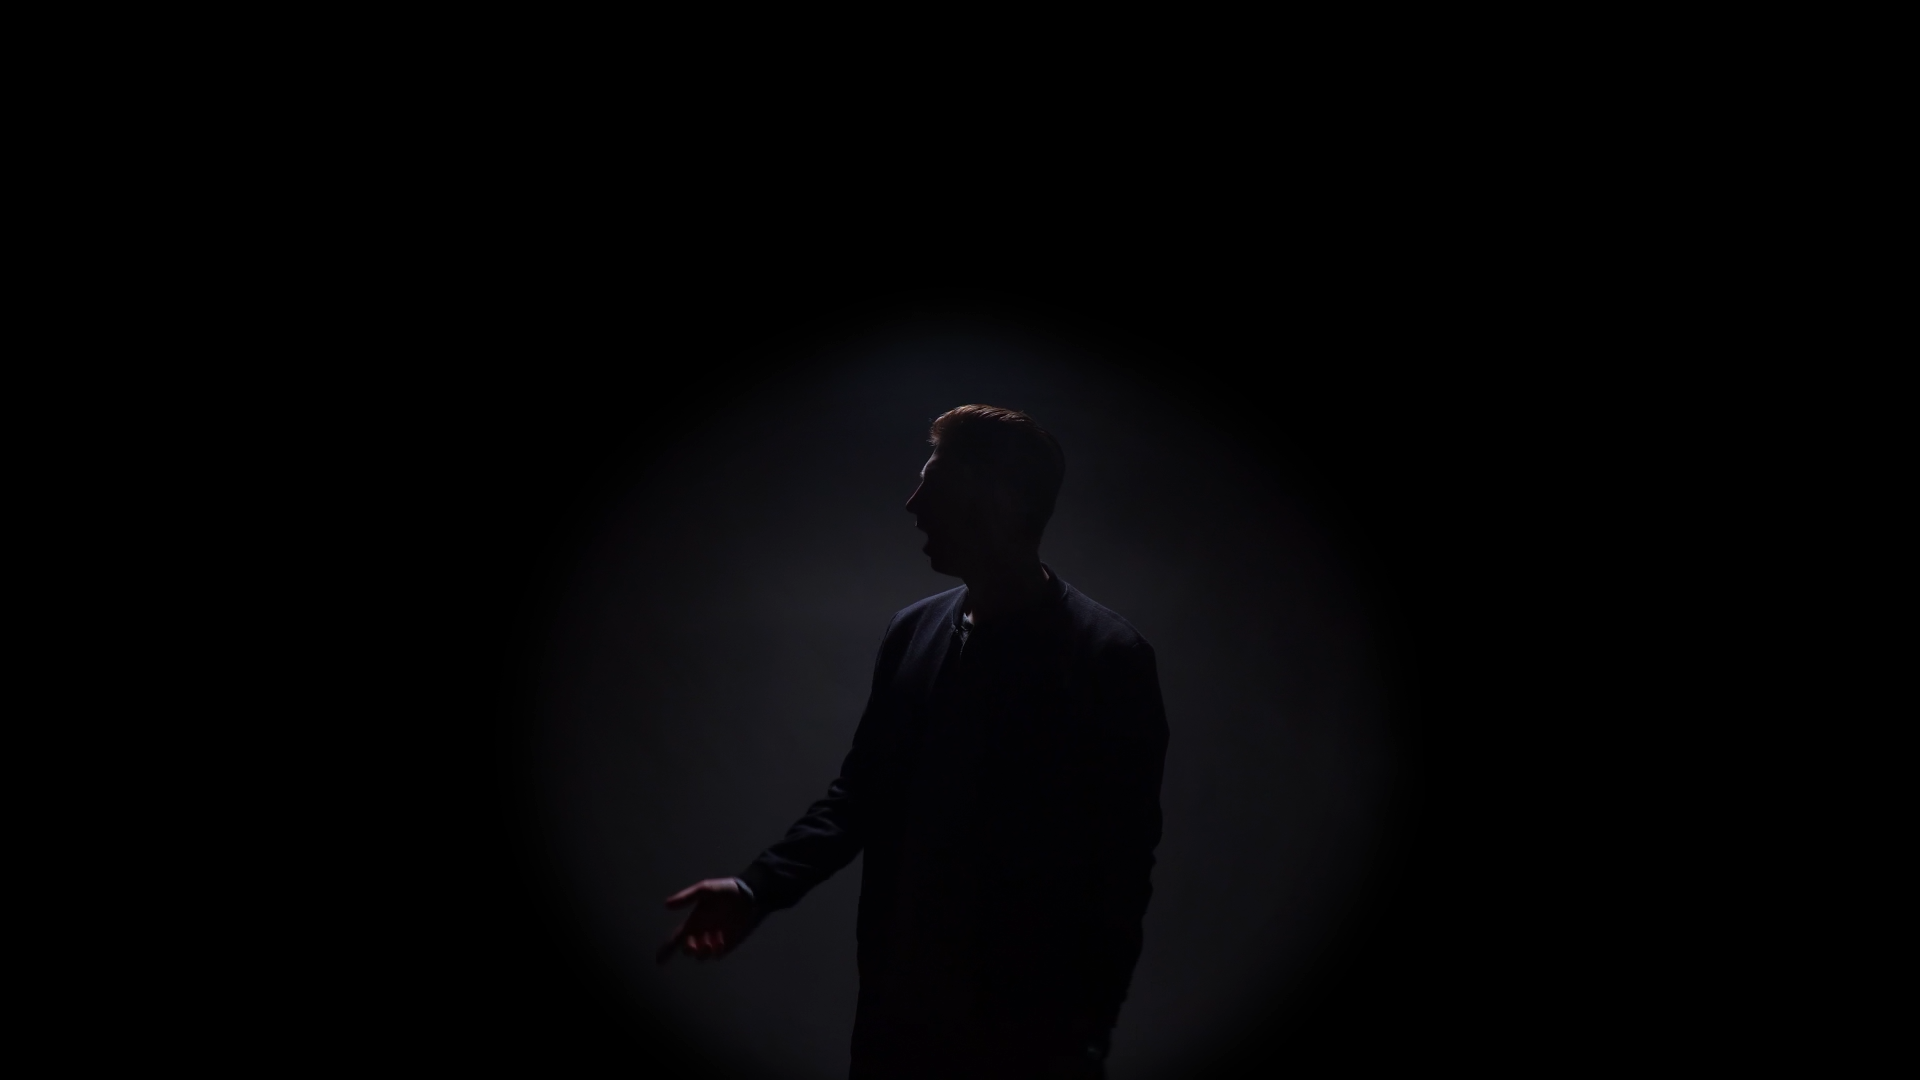
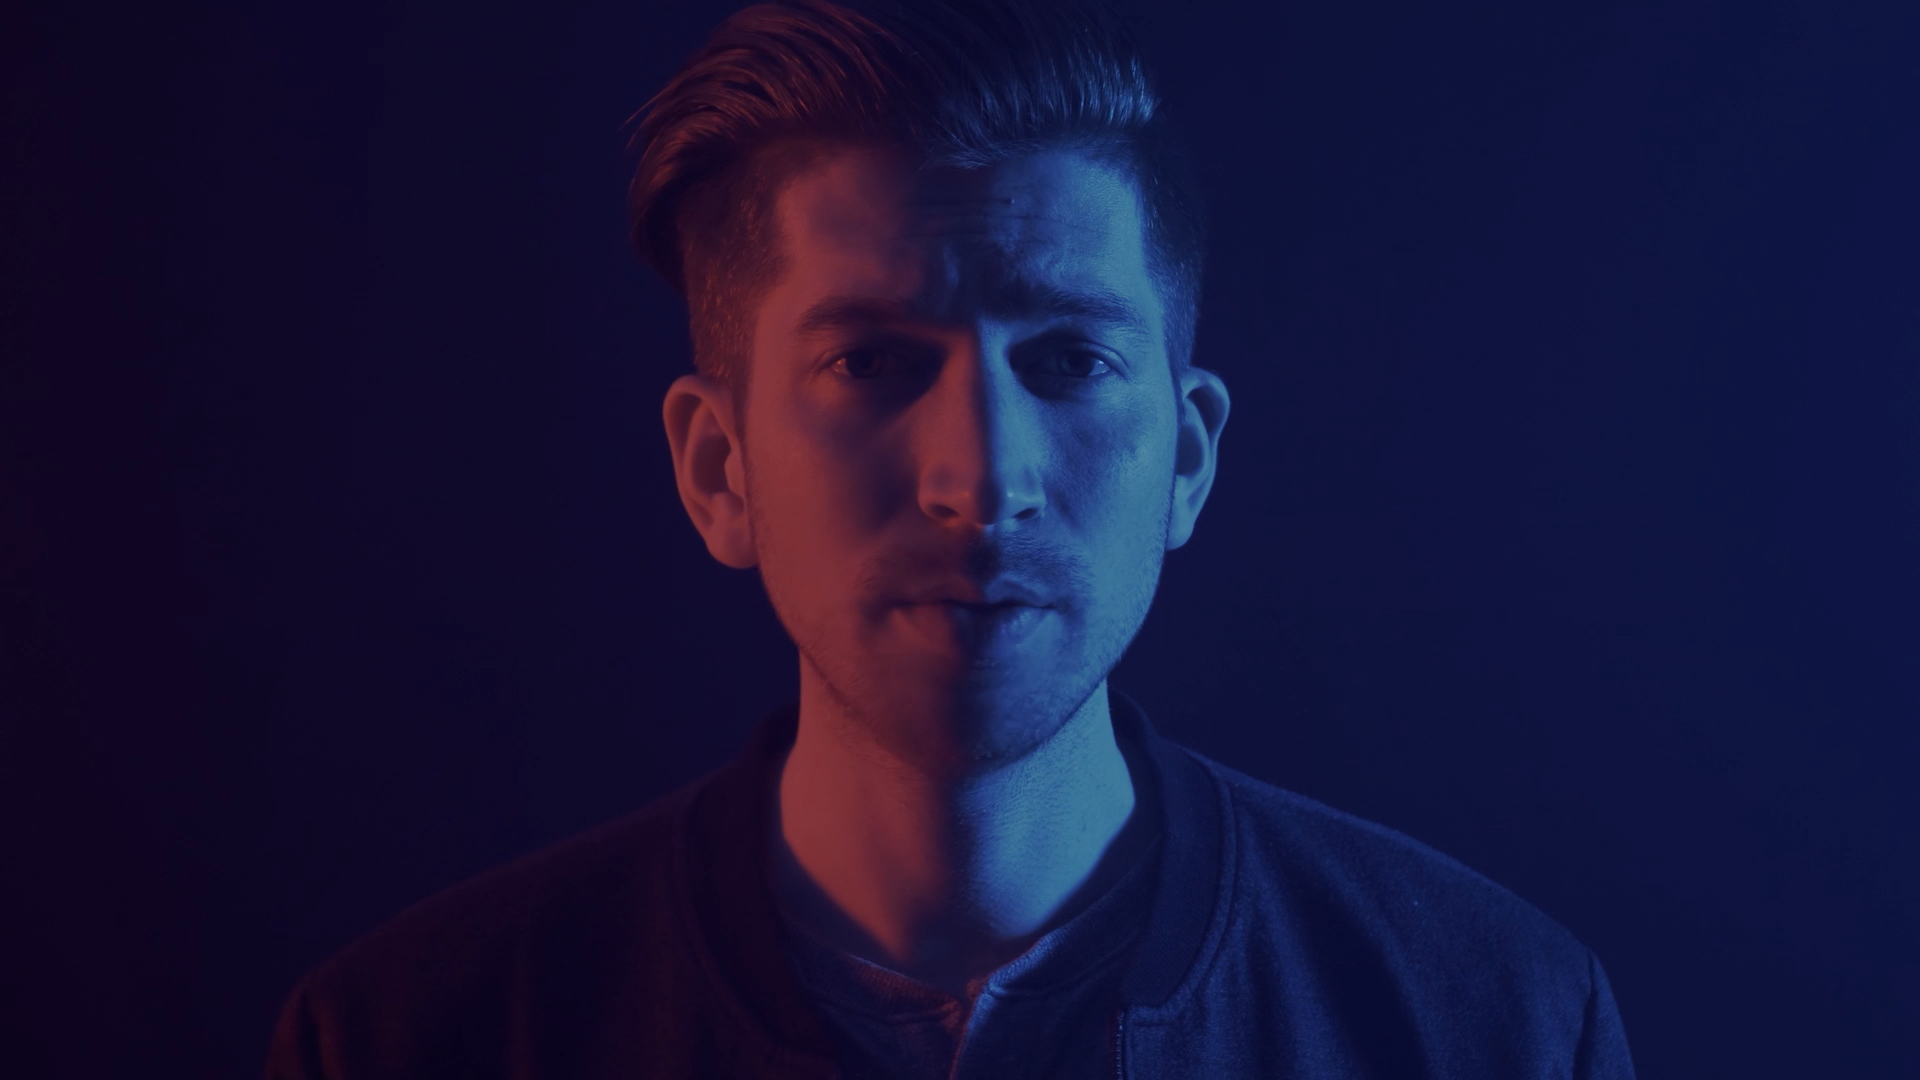
3. Studio Look - RGB
This set up is the most intense because it is creating a false location. You will need a room large and dark enough to operate in. I was in a sun room at night. I put up a large black backdrop for my background and shot my lights at my subject trying to get as little light as possible on the background. I wanted the image to stay dark and I didn’t want to lift the blacks too much. Another way to achieve this is to have space between your subject and the background. That way the light has to travel longer and will lower in intensity by the time is hits the black backdrop. Sometimes that isn’t doable because the farther you are the larger the backdrop will need to be. This is why I kept the angle as a medium shot because I couldn’t make it any wider without shooting off set.
For Taking Over Me, the colored lights are coming in on each side creating a clear separation in color (TOM 3 R). This created a shadow down the middle of the face which helps emphasize the 50/50 lighting.
For Tan Lines, I wanted to have a color accurate skin tone in the image. Therefore, I adjusted the colored lights to be a backlight on each side and used a soft white light in the front to key my subject (TL 3). This allowed for the color to be represented off the subjects hair with her skin tone unblemished from the harsh red and blue.
3a. Studio Look - Silhouette
Another cool look that I did with the same exact set up is a silhouette on a white backdrop creating a halo glow effect (TOM 3 L). You may be wondering, “where is my light?” Well this shot actually has a small amount of visual effects. I had to crop out the light and extend the background. Something that’s a bit more complicated to explain over text. To the right I have my original video on this music video breaking it all down. I also cover the lighting scheme for the golden hour and parking lot shots in the Taking Over Me music video.
Post-Production
On-Beat vs Off-Beat Editing
It’s very natural to want to place most if not every single cut on the beat of the music video. It just makes sense right? Yeah it totally does. But not all the time. If you want to create some energy with the edit then on-beat editing is perfect. But do it too much and you’ll have a repetitive predictable edit. In fact, wait until the song really picks up. For example, in Taking Over Me my first on beat edit is at :17 followed up with another at :18 to emphasize the introduction of the drums and to create some energy.
So what was I doing before? Just whatever I wanted?
The song has a slow start so I decided to edit to the melody. I would cut on the phrases of the lyrics. If there’s a break or a new phrase I’d cut.
It’s also smart to cut on an off-beat to continue the energy of the piece but to break up the predictability of the edit. Or don’t cut on the beat at all! It doesn’t need to be this 1-2-3-4 edit for three minutes. The song should offer so many options to adapt your edit and make it fit to the track like a glove. Also, you might be setting something up visually in the music video and need more edit points in order to do that. So don’t stress it!
There’s only one rule when it comes to editing a music video. Don’t be boring.
Blending Locations In The Edit
Do you show all your locations from the beginning and keep bouncing around or do you withhold one for a certain part of the song? For me, there’s usually a time where you need a big shake up in the visuals. It’s usually either the second chorus or bridge. But every song is different. Here is my process for editing each music video.
1. Taking Over Me
For Taking Over Me, it was incredibly clear that the second verse was going to be the introduction of the Studio RGB look. It is the most electronic and chaotic part of the song and I felt a large visual mix up was needed. Plus electronic and color go together very well. Have you seen TRON?
Because of this I was okay showing all my cards (showing all my locations) early in the song because it matched the tone the song had. Since I played my cards early I’d then go back to only the first two locations for a while. Then, I brought back the RGB for the final chorus re-energizing the edit until the end.
2. Tan Lines
For Tan Lines the thought process was much different. I decided to hold off on the RGB lighting all the way until the bridge of the song. That leaves me with almost 2 minutes with only 2 locations! The big question is if I should bounce back n forth between the two locations or hold off.
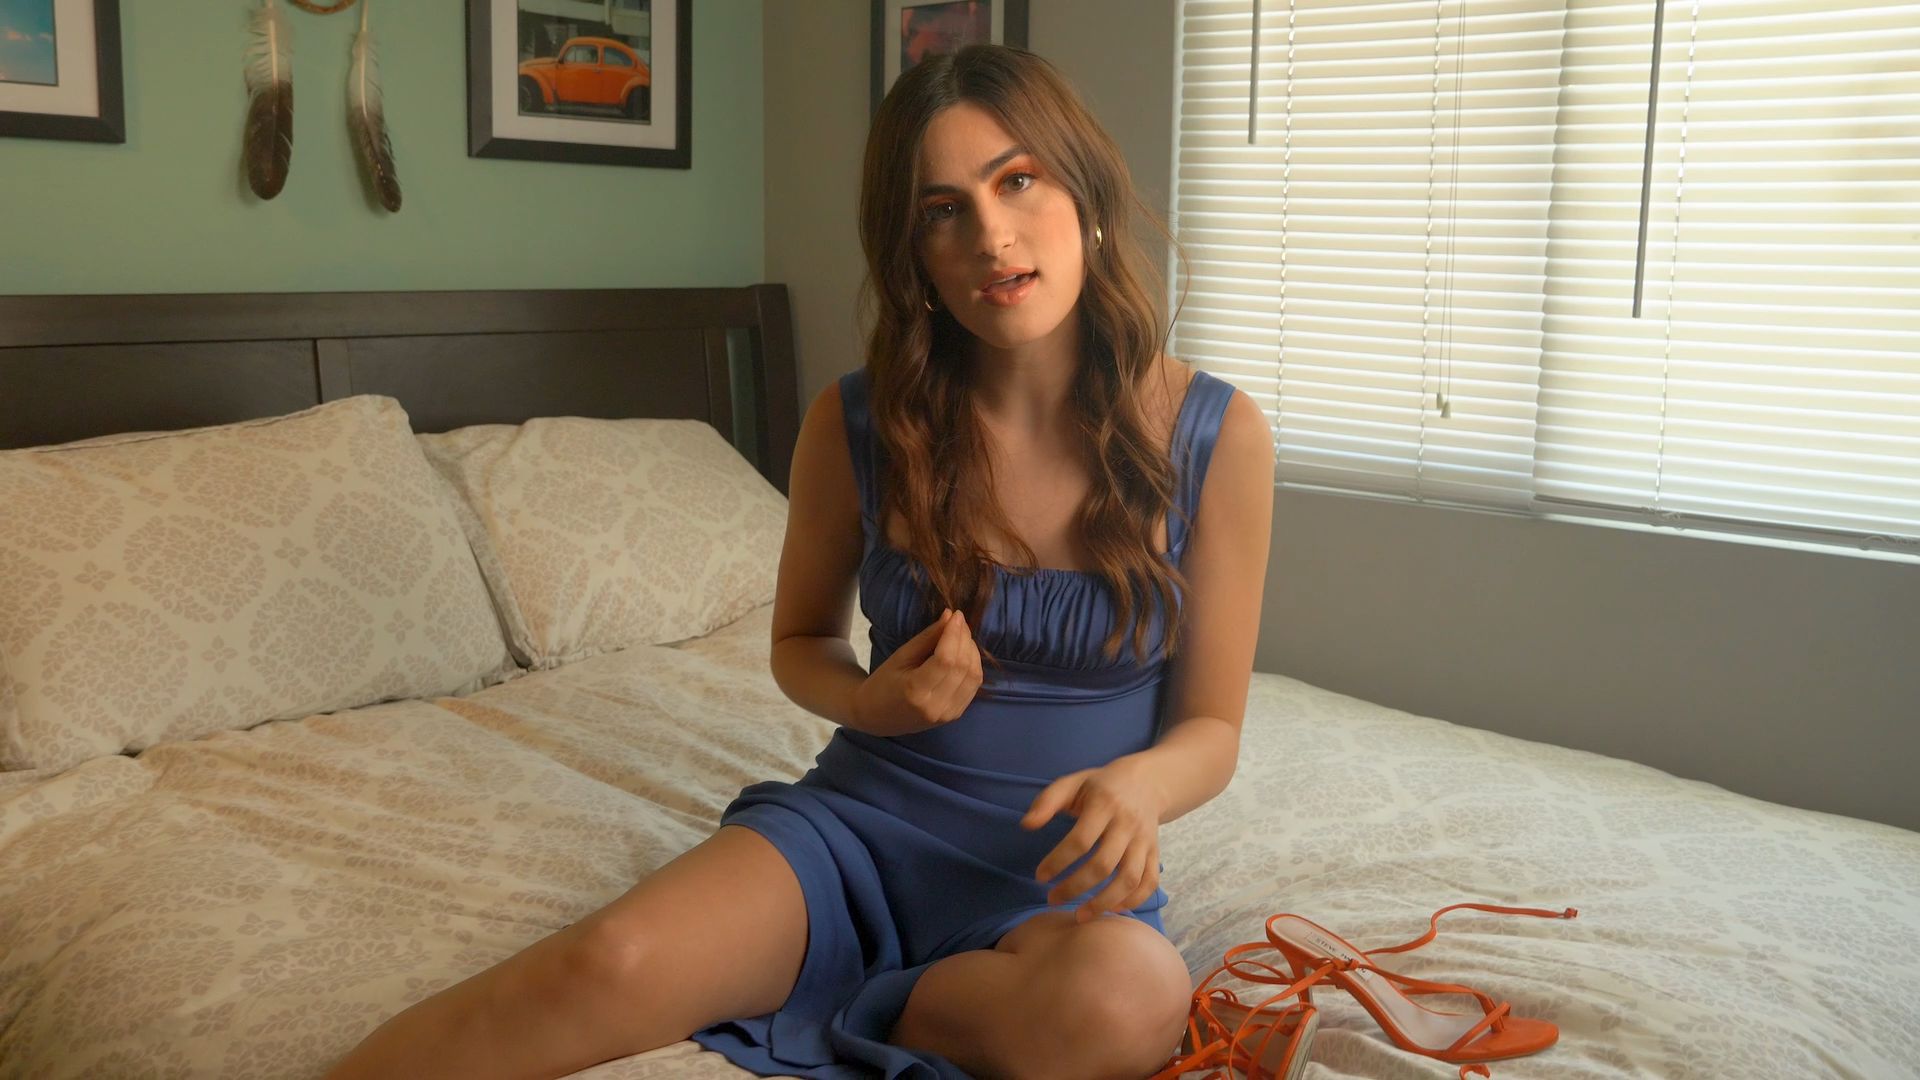
The deciding factor was the intro shot into the second verse where there is a birds eye view of our subject on the bed. I liked this shot so much yet I didn’t think it was a good opening shot. Rather a solid transition. But it wouldn’t hold that much weight as a transition if I’ve been cutting back n forth the whole time. This needed to be the introduction to the new location.
I decided to hold on the first location at the beach for the entire first verse and chorus. Then transition to location two for the next verse and chorus. Then finally landing at the third location to emphasize the bridge of the song.
This is a more linear take on the edit withholding the locations as we go.
What kept this edit moving to the finish line was the camera movement and the coverage. You’ll notice there is a lot more coverage in this video to be able to hold on each scene longer while keeping them as interesting as possible.
Then just like the last video all three locations come into play for the final chorus. I did add a cool strobe effect to help the energy of the final chorus. That was done all in camera by the lights having the effect built in.
It’s all up to you
What people forget to tell you about low budget productions is that they are a labor of love. They are cheaper because no one is getting paid. Or only a few key players are getting paid. But regardless, everyone is going above and beyond the call of duty.
So whether you are in production or post production it is very much a “more you put into it the more you get out of it” situation. I easily spent 30 hours editing and color grading these videos figuring out the best way to construct the edit.
It’s up to you to polish what you have and deliver something that will look and feel thousands of dollars more expensive than what your actual cost was.
And always remember, this is YOUR project. You will have to be the hardest worker by far to see this through completion.
Good Luck! If you have any questions comment below.